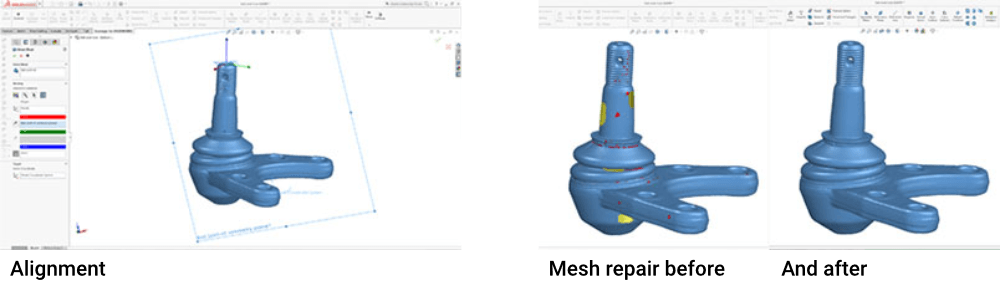
Point and polygon editing tools, including scan alignment
Geomagic for SOLIDWORKS provides the necessary tools to quickly edit and repair scans. Scans can also be aligned to other previously captured scans, as well as to the World Coordinate System.
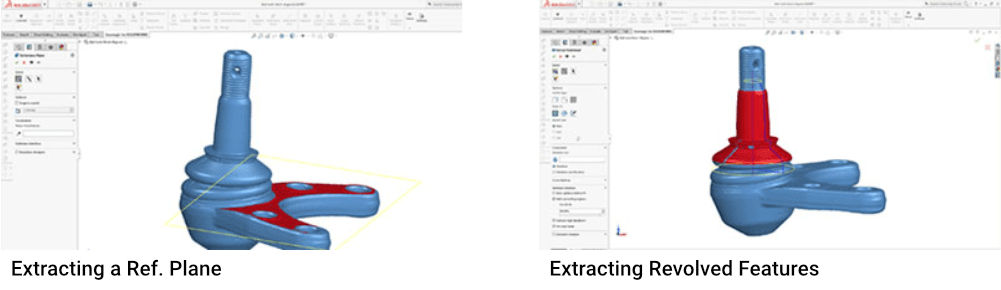
Extract Reference Geometry and Parametric Features
Geomagic for SOLIDWORKS also allows you to extract Ref. Geometry and create editable, parametric features directly from the scan data.
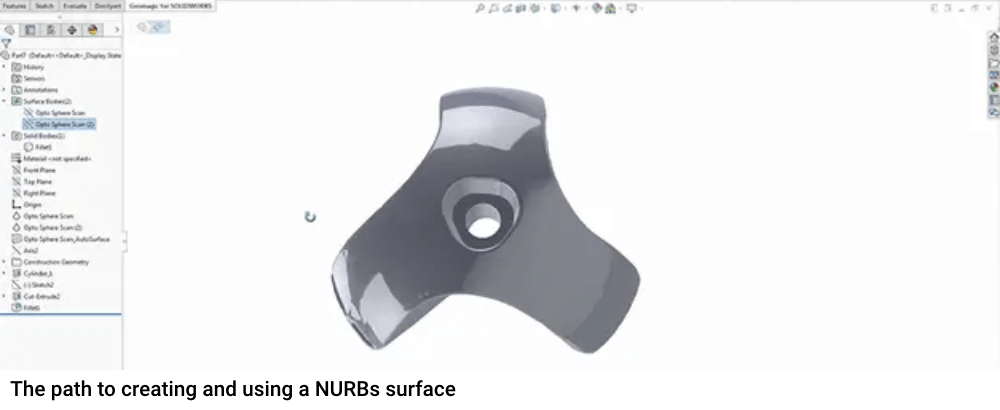
NURB Surfacing for Organic and Freeform Shapes
Geomagic for SOLIDWORKS also includes the ability to quickly create accurate NURB surfaces, allowing you to capture Organic and Freeform shapes and use them in models of your choice.
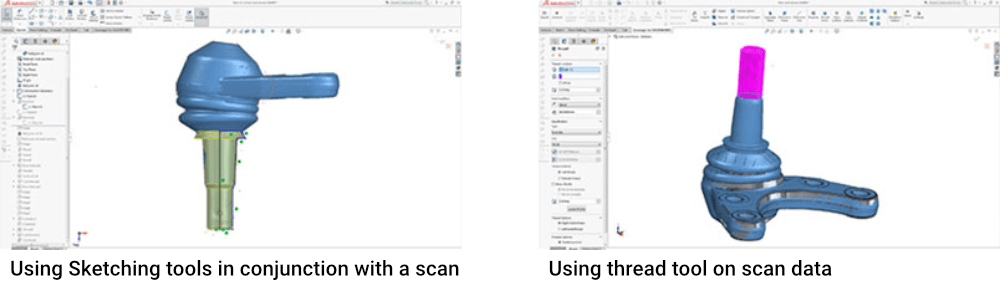
Use the SOLIDWORKS toolset to create models
Since Geomagic for SOLIDWORKS operates in the SOLIDWORKS environment, you have the advantage of using the same tools and workflows that you are already familiar with to create models from Scan Data with ease and comfort.
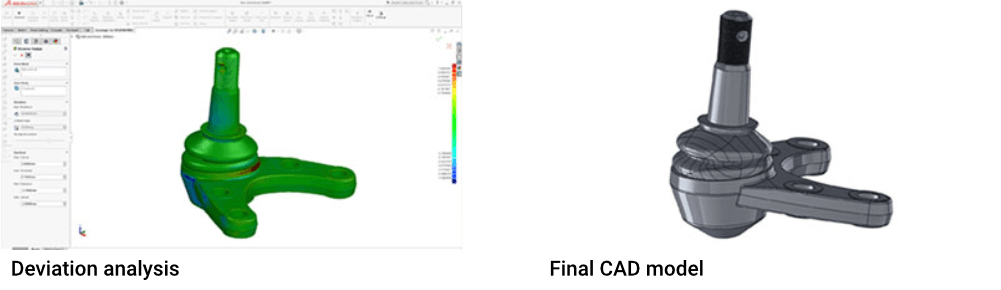
Deviation Analysis
With Geomagic for SOLIDWORKS plugin, you also have the ability to check the deviation between the SOLIDWORKS model and the scan data. This allows you to create accurate designs and provides a level of traceability.
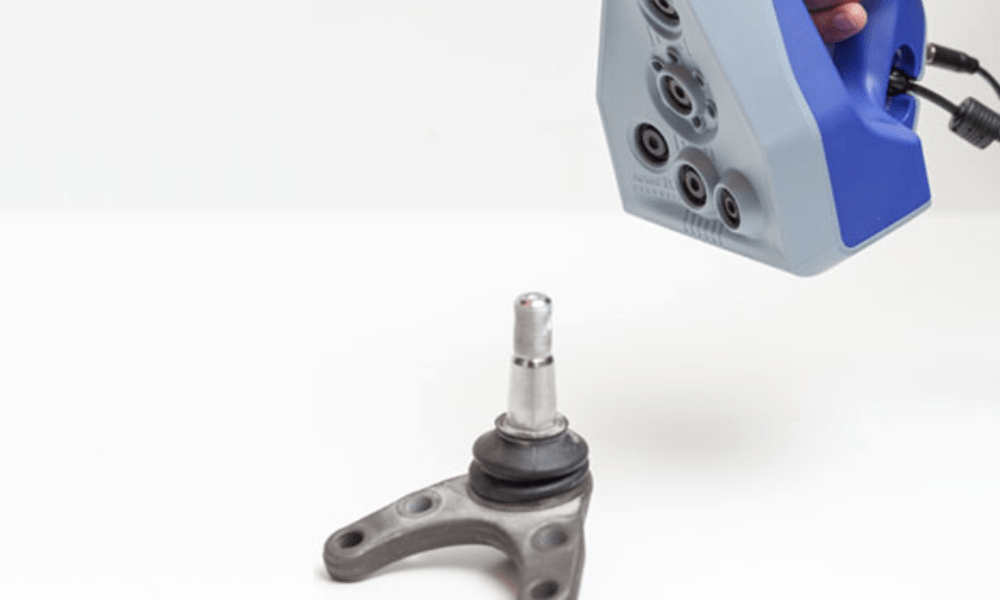
Scan an object using a
3D scanner
Here, we used Artec Space Spider to capture a ball joint, an object containing several holes. To successfully capture a hole, simply make sure that the scanner can track all or at least most of the edge area. Hold the scanner at a 90-degree angle to ensure the best capture.
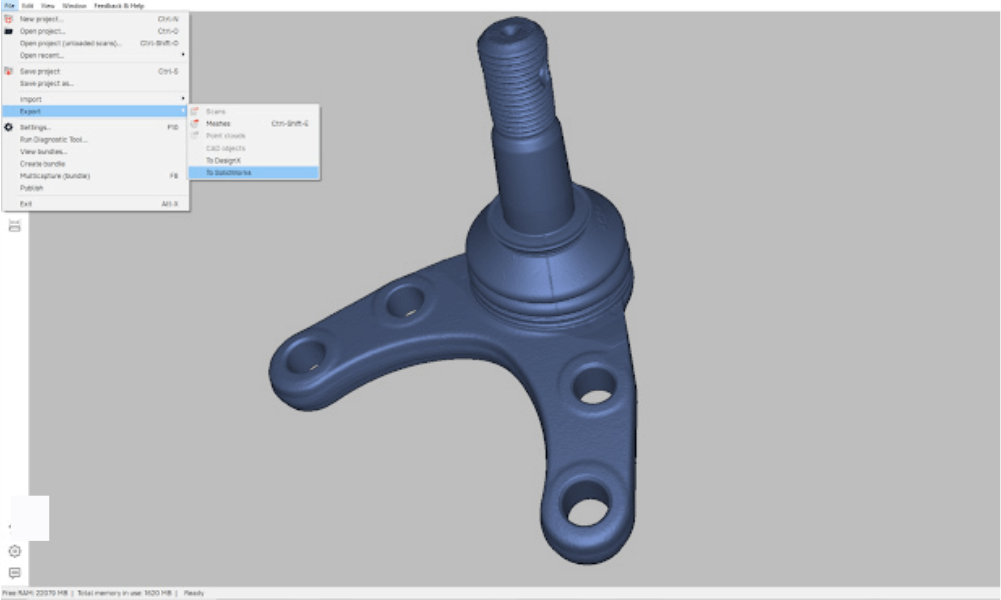
Convert scan to mesh in the any CAD software
Once you’re done scanning, you can view and edit the model in the Artec Studio 3D software. Use the Autopilot mode for fast, automatic post-processing with minimal user interaction, or take full control of the process with the manual mode.
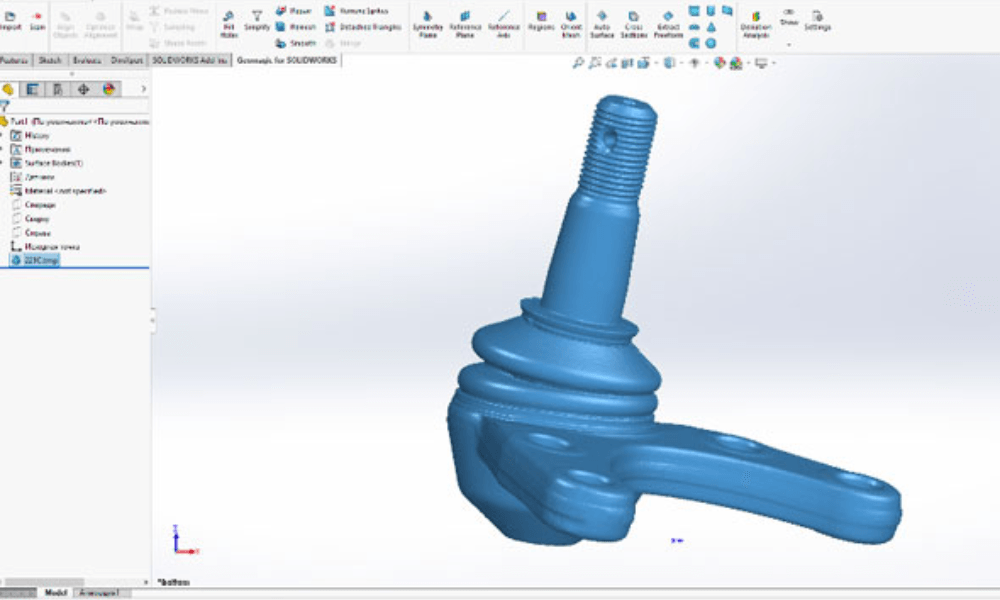
Import mesh file into Solidworks
After exporting the mesh file, import it into SOLIDWORKS. Once imported, use the Geomgaic for SOLIDWORKS plugin to view and edit the model in the SOLIDWORKS environment.
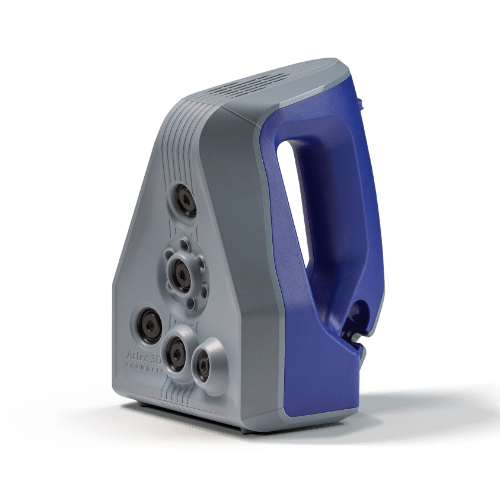
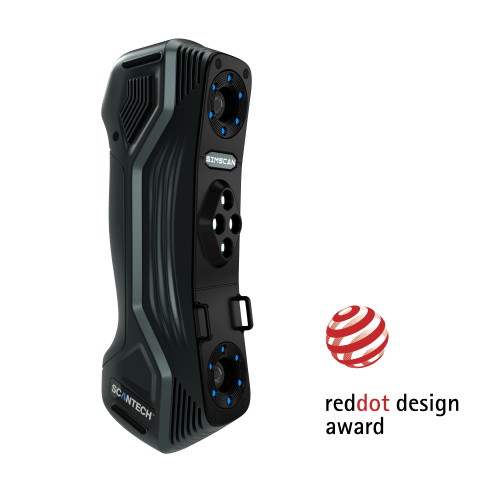
Metrology grade infrared + blue laser handheld scanner with built-in photogrammetry system
| Scanner Type | Handheld |
| Object Size 🛈 Typical Object Sizes: XS: Coins, Jewelery S: Camera, Pumps M: Engines, Sculptures L: Small boats, Turbines |
XS, S, M, L |
| Laser source | Blue + infrared |
| Accuracy | Up to 0.020 mm |
| Resolution | Up to 0.010 mm |
| Output Type | 3D mesh |

The world’s first wireless and AI-driven 3D scanner
| Scanner Type | Handheld, Wireless |
| Object Size 🛈 Typical Object Sizes: M: Engines, Sculptures L: Small boats, Turbines |
M, L |
| Light source | VCSEL + White LED |
| 3D Point Accuracy | Up to 0.10 mm |
| 3D Resolution | Up to 0.20 mm |
| Output Type | 3D mesh + texture |
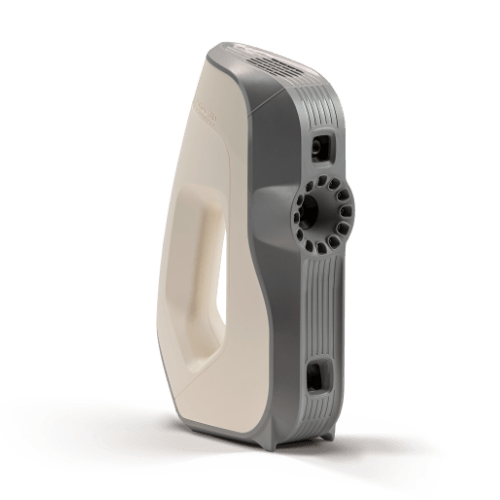
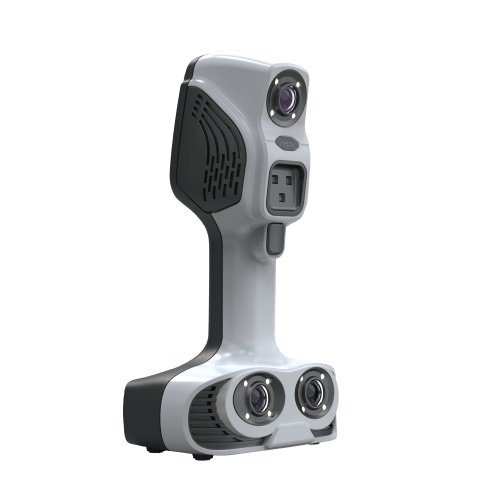
Award-winning, light and compact metrology grade 3D scanner with an ergonomic design
| Scanner Type | Handheld |
| Object Size 🛈 Typical Object Sizes: XS: Coins, Jewelery S: Camera, Pumps M: Engines, Sculptures |
XS, S, M |
| Laser source | Blue |
| Accuracy | Up to 0.020 mm |
| Resolution | Up to 0.025 mm |
| Output Type | 3D mesh |

Intelligent fully wireless optical tracking system for precision 3D scans without targets
| Scanner Type | Wireless, Handheld |
| Object Size 🛈 Typical Object Sizes: S: Camera, Pumps M: Engines, Sculptures L: Small boats, Turbines |
S, M, L |
| Laser source | Blue |
| Accuracy | Up to 0.025 mm |
| Resolution | Up to 0.020 mm |
| Output Type | 3D mesh |

Intelligent optical tracking system for delivering ultra-high precision 3D scans without markers
| Scanner Type | Handheld |
| Object Size 🛈 Typical Object Sizes: M: Engines, Sculptures L: Small boats, Turbines |
M, L |
| Laser source | Blue |
| Accuracy | Up to 0.025 mm |
| Resolution | Up to 0.020 mm |
| Output Type | 3D mesh |
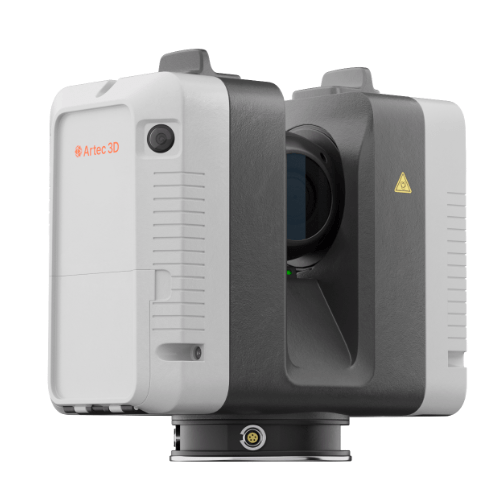
High accuracy long-range laser 3D scanner, ideal for precise capture of large objects
| Scanner Type | Tripod mounted |
| Object Size 🛈 Typical Object Sizes: L: Small boats, Turbines XL: Warehouse, Airplane |
L, XL |
| Laser source | LiDAR |
| Angular accuracy | 18 arcseconds |
| Range | Up to 130 m |
| Output Type | 3D mesh + texture |

Optical probing system for high-accuracy and flexible measurements
| CMM Type | Wireless, handheld |
| Object Size 🛈 Typical Object Sizes: S: Camera, Pumps M: Engines, Sculptures L: Small boats, Turbines |
S, M, L |
| Volumetric Accuracy | Up to 0.049 mm |
| Measurement Distance | 10 m |
| Part Size Range | 0.1 m to 12 m |
| Output Type | 3D points |
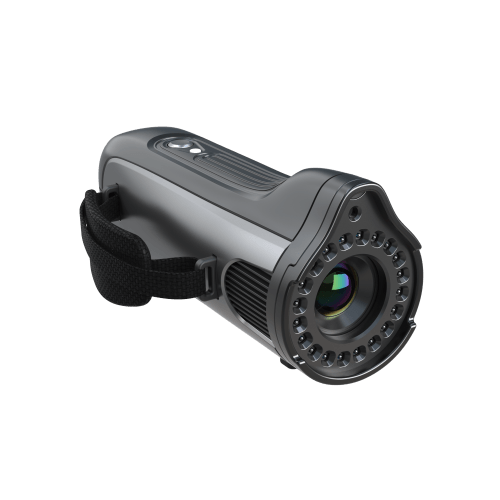
Cutting-edge 3D scanner for capturing detailed 3D geometry and rich colors in textures
| Scanner Type | Handheld |
| Object Size 🛈 Typical Object Sizes: S: Camera, Pumps M: Engines, Sculptures |
S, M |
| Laser source | Structured infrared VCSEL |
| Accuracy | Up to 0.1 mm |
| Color reproduction | 24 bit |
| Output Type | 3D mesh + texture |
Photogrammetry system tailored to deliver precise geometric measurements of large parts
| CMM Type | Optical, handheld |
| Object Size 🛈 Typical Object Sizes: M: Engines, Sculptures L: Small boats, Turbines |
M, L |
| Volumetric Accuracy | 0.015 mm/m |
| Depth of field | 6.5 m |
| Capture area | Up to 9.4 m x 6.9 m |
| Output Type | 3D points |